Category Archives: Iceland Travel Blog

The Andrew Johnston Iceland Camouflage Masterclass

The Andrew Johnston Iceland Camouflage Masterclass
Camera: Canon EOS 7D | Lens: EF-S17-85mm f/4-5.6 IS USM | Date: 26-08-2011 15:19 | ISO: 100 | Exp. bias: 0 EV | Exp. Time: 1/125s | Aperture: 10.0 | Focal Length: 28.0mm (~45.4mm) | Location: Kirkjufell | State/Province: South | See map | Lens: Canon EF-S 17-85mm f4-5.6 IS USM

The trouble is, there’s a recurring theme here…

View featured image in Album
Posted in Humour, Iceland Travel Blog, Namibia Travel Blog, Travel | Leave a comment

Iceland Album Now Online!

0811 7D 6859
Camera: Canon EOS 7D | Date: 21-08-2011 16:56 | ISO: 200 | Exp. Time: 1/160s | Aperture: 10.0 | Focal Length: 28.0mm (~45.4mm) | Latitude: N 64°19'34.82" | Longitude: W 20°7'28.19" | Altitude: 218 metres | Location: Gullfoss | See map | Lens: Canon EF-S 15-85mm f3.5-5.6 IS USM

I’ve finally posted my complete album from the 2011 Iceland Trip! Please look inside and let me know what you think…

Read the full articleView featured image in Album
Posted in Iceland Travel Blog, Photography, Travel | Leave a comment

A Delightful Little Surprise

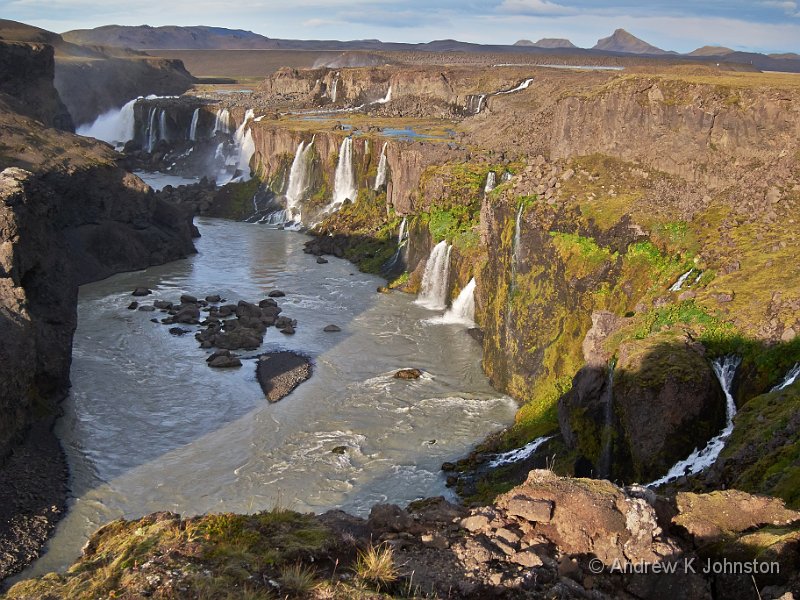
Waterfalls at Veldivnathraun, Iceland
Camera: Canon PowerShot S95 | Date: 24-08-2011 19:02 | Resolution: 3648 x 2736 | ISO: 200 | Exp. bias: -1/3 EV | Exp. Time: 1/1000s | Aperture: 3.2 | Focal Length: 10.7mm | Location: Hrafntinnuhraun | State/Province: South | See map | Lens: Canon EF-S 10-22mm f/3.5-4.5 USM

I’ve just finished processing the photographs from my 2011 trip to Iceland! I’ll get the best up on my site over the next week or so. At least I’ve avoided the second anniversary of the trip…

There was a wonderful little twist in the tail. I was processing the last few shots, most of which were taken on my Canon 7D, and the very last were a couple of shots taken walking away from one of our locations, when the sun suddenly hit the waterfalls just right. I assumed that these were also from the 7D, but the filename and data tell a different story. These were taken on my diminutive Canon S95. Not bad, huh?

View featured image in Album
Posted in Iceland Travel Blog, Photography | 2 Comments

Back to the ‘Fray

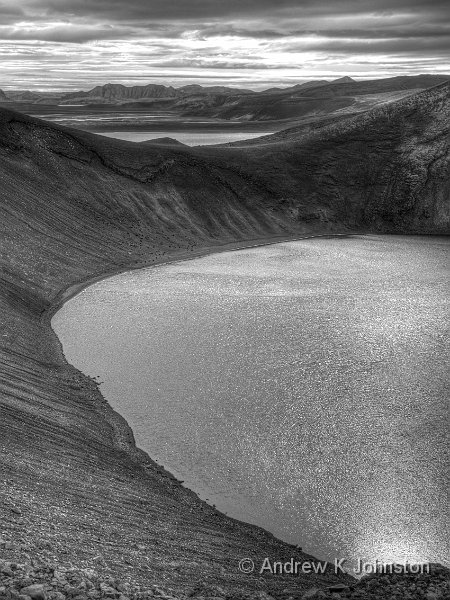
Monochrome HDR shot of the "Ugly Pond" and stormy sky beyond
Camera: Canon EOS 7D | Lens: EF-S17-85mm f/4-5.6 IS USM | Date: 24-08-2011 10:43 | ISO: 100 | Exp. Time: 1/250s | Aperture: 10.0 | Focal Length: 30.0mm (~48.6mm) | Location: Einbúi | State/Province: South | See map | Lens: Canon EF-S 17-85mm f4-5.6 IS USM

Oh well… The annual pilgrimage to the sun has come and gone, and it’s back to the ´fray. (I assume that “fray” is a contraction of “affray” – is that correct?)

Updates to my web site are almost complete. As a salutary lesson to others in a similar position, what I had hoped would be a few weeks’ work turned into something which chewed up most of my “development” time for over three months. However I now have a site which works well on almost all devices (although there are a couple of outstanding oddities and the style sheets still need tweaking for phones with relatively low resolution screens, such as older iPhones). I’m hoping my “lessons learned” will make interesting reading to anyone with a similar challenge, and I’m also confident that future changes will be easier to achieve.

I’m also hoping to get back to blogging on other topics, which have been neglected a bit in recent times. If you have any preference on topics then please let me know.

Most of my recent posts have been book reviews, and I thought the blog needed a picture at the top, hence the above. I’ve been processing some outstanding photos from my Iceland trip, and I was rather taken with this one, which is another HDR monochrome development from three originals processed using Photomatix. What do you think?

View featured image in Album
Posted in Iceland Travel Blog, Thoughts on the World, Website & Blog | Leave a comment

Fixing Holes

Fixing a Hole: Iceberg on the Jokullsarlon glacial lake, Iceland
Camera: Canon EOS 7D | Lens: EF70-300mm f/4-5.6 IS USM | Date: 27-08-2011 11:08 | ISO: 100 | Exp. bias: 0 EV | Exp. Time: 1/40s | Aperture: 10.0 | Focal Length: 100.0mm (~162.0mm) | Location: Jökulsá | State/Province: East | See map | Lens: Canon EF 70-300mm f/4-5.6 IS USM

I’m making decent progress rolling out my new design to the website, but apologies if you’re waiting for some more interesting content!

I’ve now got to the “fiddly” stage, making sure that the new theme works on the slightly more tricky pages. Basically a process of “fixing holes”. I’ve also been processing a few more of my photos from Iceland, and I thought this one a neat echo of my other activities!

Please let me know how you get on with the new look website, and particularly if there are any problems on particular devices or browsers…

View featured image in Album
Posted in Iceland Travel Blog, Website & Blog | Leave a comment

Photographing Waterfalls

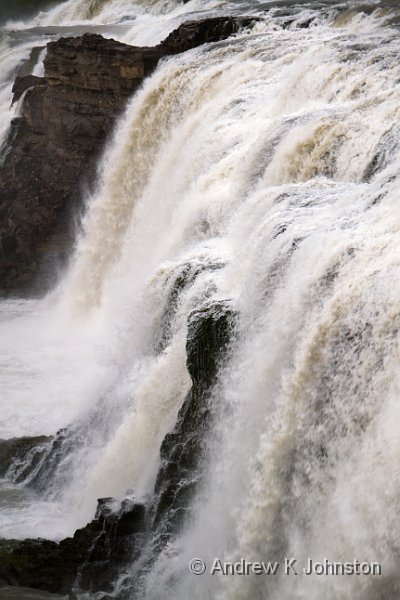
Gullfoss, Iceland, up close and personal
Camera: Canon EOS 7D | Lens: EF-S17-85mm f/4-5.6 IS USM | Date: 23-08-2011 11:02 | ISO: 100 | Exp. bias: 1 EV | Exp. Time: 1/100s | Aperture: 5.6 | Focal Length: 85.0mm (~137.7mm) | Lens: Canon EF-S 17-85mm f4-5.6 IS USM

I’m afraid I don’t subscribe to the received wisdom that waterfalls should be photographed with long exposures which capture the flow as a sort of silky mush. That might work for gentle trickles in dappled glades, but if you’re looking at something like Iceland’s mighty Gullfoss you (or at least I) want to somehow capture the power of the flow. However, just setting a fast shutter speed, pointing the camera straight on and freezing the motion doesn’t always work either.

I took around 100 shots around Gullfoss. I’m only really happy with a handfull, but yesterday I discovered this one which I think really works. Although I’ve labelled it “up close and personal” it was actually taken from further away than some of the others, but I like the pattern of flows and rocks revealed in the portrait orientation. I also think that the 1/100 shutter speed gets a pretty good balance between “flow” and “power”, although it’s a lot faster than some would go for. What do you think?

View featured image in Album
Posted in Iceland Travel Blog, Photography | Leave a comment

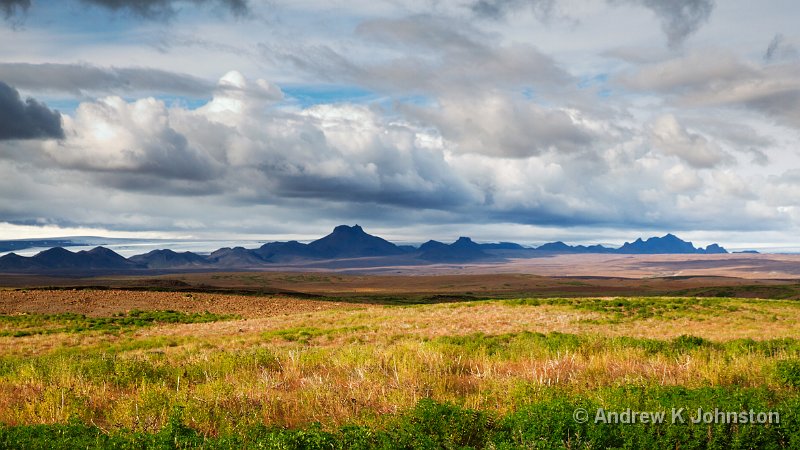
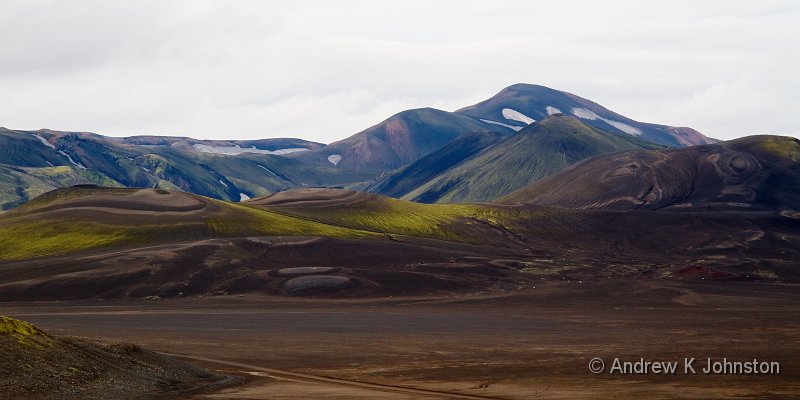
The Back of Beyond

"The Back of Beyond" - scene from the Fjallabak region, Iceland
Camera: Canon EOS 7D | Lens: EF-S17-85mm f/4-5.6 IS USM | Date: 24-08-2011 10:48 | ISO: 100 | Exp. bias: 0 EV | Exp. Time: 1/100s | Aperture: 11.0 | Focal Length: 80.0mm (~129.6mm) | Location: Einbúi | State/Province: South | See map | Lens: Canon EF-S 17-85mm f4-5.6 IS USM

I haven’t posted any photos since the end of our USA trip, but I have, finally, got back to sorting out my Iceland photos from last year. I thought, therefore, I would share this shot with you. It’s from an un-named spot in the Fjallabak region. Fjallabak (pronounced fiat-la-back) means “back of the mountains”, which is delightfully literal in this case.

I love the various circular swirls which are a recurring feature in this image. I’m not sure whether they all have a common geological cause.

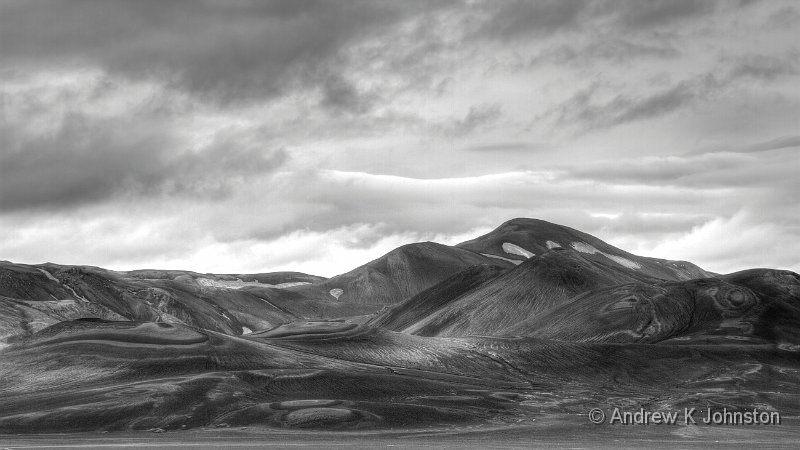
I also did an HDR version of a similar shot, which brought out more of the sky detail but reduced the nice smooth feel of the mountain shapes. However, the black and white conversion looks quite dramatic, and with a slightly different crop works quite well:


I need to do a bit more work on the HDR version – at full resolution there’s a bit of odd “banding” in the sky – but I think it looks promising.

Which do you prefer?

View featured image in Album
Posted in Iceland Travel Blog, Photography | Leave a comment

That Shouldn’t Have Worked…

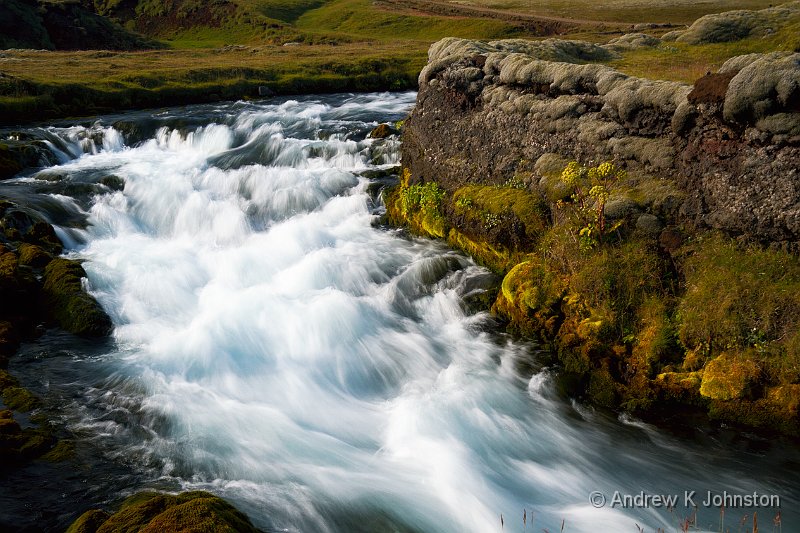
Mountain stream at Graenfjall, Iceland
Camera: Canon EOS 7D | Lens: EF-S17-85mm f/4-5.6 IS USM | Date: 26-08-2011 16:21 | ISO: 100 | Exp. bias: 0 EV | Exp. Time: 1/5s | Aperture: 14.0 | Focal Length: 26.0mm (~42.1mm) | Location: Grænafjall | State/Province: South | See map | Lens: Canon EF-S 17-85mm f4-5.6 IS USM

There’s a lovely moment in the film Sahara where Pitt and Giordano are following a typically desperate plan in the hope that if they can kill the villain his men will just surrender and lay down their arms. When, to their surprise, this starts to happen they look at each other and say simultaneously “That shouldn’t have worked…”. This is the photographic equivalent.

There are two schools of thought on how you should photograph moving water. One approach is to use a fast shutter speed and “freeze” the motion. I’m convinced that this is the best approach for large waterfalls, fast rivers or large waves, and you’ll see it in many of my photographs. As long as there’s enough light then there’s no major technical challenge with that approach.

The opposing school of thought is that you use a very slow shutter speed (typically a large fraction of 1s) and show the water as a blur. This expresses the direction of motion, but personally I don’t think it expresses the force or the dynamics so well. However, as Iceland has almost as many waterfalls as Venice has gondolas (see “Waterfalls, Waterfalls…”) I decided that this was an ideal opportunity to experiment.

I’ve come to the conclusion that the slow shutter speed approach does work, but it works best for small features with complex flow patterns, but relatively low flow speed/force. I’ve also reached the conclusion that a lazy man will work harder to avoid work than to actually do the job! 🙂

Here’s the official, recommended method to get a shot like the above:

  1. Pre-visualise the result you want, ideally using a cardboard rectangle instead of actually looking through your camera’s viewfinder.
  2. Set up your tripod. The heavier this is the better. If the waterfall is a long way from the road be grateful for the exercise. 🙂
  3. Curse when you realise that to position the tripod correctly either it, or you, are going to get very wet.
  4. Turn off image stabilisation, and mount your camera on the tripod. Attach the remote release.
  5. Fine tune the camera and tripod position to get the composition right. Curse when more of your kit gets wet.
  6. Set the exposure to get a shutter speed of 1/4 to 1s. Start by selecting the lowest ISO and a small aperture (say f22). If this isn’t enough, attach a polariser. If this is still not enough, take out the Lee/Cokin filter kit, mount up the filter holder, and slide in your neutral density filter(s).
  7. Meter carefully. Typically the highlights will be very bright if there’s any direct sunlight, and automatic metering may either over-expose or under-expose depending on how much of the scene is bright water relative to the rest.
  8. Take the shot.

In fairness, this method works well, even if your photography costs $10 a shot and you don’t see the results until six weeks after leaving the location. However, here is the alternative Andrew Johnston Patent Digital Method:

  1. Wander over to the interesting waterfall, and decide that this is one you want to photograph with blurred movement.
  2. Realise that it’s a long walk back to the jeep, and you can’t be ****d to get your tripod. Anyway, where you want to stand it would only get wet…
  3. Set your camera to its lowest ISO, aperture priority and a high aperture. On an APS-C DSLR you probably don’t want to go much higher than f16 as diffraction effects start to kick in.
  4. Make sure image stabilisation is on. If you want to control reflections and highlights attach a polariser and get it set right.
  5. Take a quick shot to check exposure. Dial in exposure compensation as required.
  6. If the resulting shutter speed is in the region of 1/10s – 1/4s you’re probably OK. If it’s too low, just reduce the aperture. If it’s still too high, take the ND filter out of the filter pack.
  7. Realise that the Cokin filter holder is in your other camera bag, which is in the jeep. See point 2. So don’t worry about the holder.
  8. Hold your camera firmly in your right hand. Hold the filter in the left hand, in front of the lens.
  9. Fine tune the composition, breathe in, and take the shot. Check the sharpness of the static elements on the LCD. If they are sharp enough then you’re done, if not go to step 8 and try again.

OK, if I’d had my Cokin filter holder in my bag I would have screwed it onto the front of the lens, which would at least have allowed me to brace my camera with both hands. What’s interesting is that Image Stabilisation technology is good enough that you can get decent hand-held shots at this shutter speed, and immediate digital review allows you to check their sharpness.

Next week – how to induce temporary paralysis so you can hand-hold for 25s for fireworks!

View featured image in Album
Posted in Iceland Travel Blog, Photography | Leave a comment

Iceland Photography Tips – A Spare Everything!

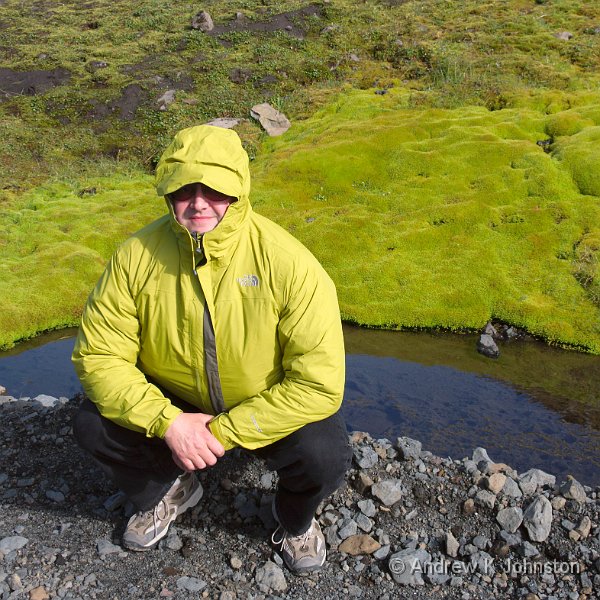
"Steamed" - action shot of the author, by James Chambers
Resolution: 531 x 397

Iceland is a great place for photography, but you need to be properly prepared to get the best of it, and not come away disappointed.

First, unless you’re very good at research, navigation and off-road driving, you need a guide. Sure, you can get to the well-known sites a short drive from Reykjavik or along the coast road under your own steam, but you’ll miss many of the most stunning locations in the interior. However, if you want to spend serious time on your photography you need to be with a group, and guides, who understand your needs. I can’t praise highly enough the great service I had from first contact with Nature Explorer. Hawk and Finn are both great company, skilful drivers, knowledgeable and entertaining guides, and impressive photographers in their own right. Their administrative staff are also excellent, and their resilience to problems comforting. I’m very happy to recommend them.

Next, dump your preconceptions. Even short distances or intervals bring dramatic variation in scenery, weather and lighting. Well known sites may be quite crowded, or almost empty. A classic view may disappoint, and then half an hour later a less obvious subject may be portfolio material. Dedicated dawn-watchers may disagree, but in my view timing isn’t critical – “golden hour” extends well into the morning and from late afternoon, but more importantly the quality of your light is much more likely to be controlled by the weather than the hour. Iceland rewards being prepared more than missing breakfast and supper.

Protect your kit well, and carry spares for everything! Iceland is a harsh environment. You’ll be doing long distances on rough roads. The volcanic dust and ash gets everywhere, and is very abrasive. You will end up soaked by rain, waterfalls and geysirs (in my case, “all of the above”;)). The failure of my 15-85mm lens wasn’t the only hardware problem in our group, although the others were mainly more minor problems with things like batteries, filters, lens caps and retaining rings. Several cameras gained battle scars from knocks and falls. I also managed to destroy a pair of trousers and gave up on a faulty battery. Nature Explorer even had to resort to a spare super-jeep!

As a minimum, make sure you have a second camera body and a second “standard” lens (whatever that means for you). My cheaper Canon 17-85mm lens rescued my trip. Consider carrying three batteries for your main body in case one dies as happened to me. Also remember one of the hidden advantages of using mid-range Canon kit – someone else in the group may be able to help. You will end up shooting in wet or dusty conditions, so a Kata Rain Bag or similar, and cheap filters you don’t mind wiping with anything to hand are both essential!

Iceland is cold, but it’s not the temperature that gets you (for our trip it was consistently above freezing and up to 14C), it’s the wind. The answer is lots of layers. For me the combination of sweatshirt, microfibre jacket with detachable lining, warm hat and raincoat with hood was about right, but others might need even more. I can also recommend carrying a flask of coffee. I ended up buying one on the first day, and leaving it behind, and had to haggle with hoteliers a couple of times about filling it, but it was well worth the effort.

Deep pockets are useful in two different ways. In a practical sense they are a great solution to the ridiculous baggage limits airlines are progressively imposing. If you can shove a couple of lenses into your trousers and heavy batteries into your jacket then the baggage allowances become less of a problem.

In the metaphorical sense you need to be prepared for high prices – Iceland isn’t cheap, especially by the standards of say the USA or southern Europe. That said, by UK standards and given the current exchange rate it didn’t feel that bad. I will comment on the recommendation made by almost every web site and guide book to buy lots of booze at the incoming duty free store. I’m now convinced this is a con trick to get free beer for Icelanders. Unless you’re a real alky, don’t bother.

Don’t expect to get anything done on the go. I had visions of sitting in the jeeps reading, writing my blog on my iPad, or at least preparing for the next location, but despite Finn being a very smooth driver this was absolutely impossible – the roads are just too rough. Not for nothing does my map of Iceland have a road classification I have never seen before: “main road – unsurfaced”. 🙂

Be prepared for all photographic opportunities, and for lots of shooting. Although my Canon 7D got most use, the 550D also came into its own for wandering around Reykjavik, and I always had the S95 in my pocket for the unexpected. I shot at every focal length from 10mm to 300mm, and at every speed from 25s for the fireworks to 8 fps for the puffins in flight. I photographed landscapes, buildings, people and action. By the end of the trip I had exceeded my Cuba shooting total, having exposed around 2100 frames, with ~1150 (~30GB) retained for further processing after initial filtering. I used about 56GB of CF cards, plus a small amount on 2 8GB SD cards for the two smaller cameras.

There’s a saying “chance favours the prepared mind”. If that’s ever true, it’s true of photographing Iceland.

If you want to see more of my Iceland photography blog, or get a few specific location ideas, please go to www.andrewj.com/blog/iceland
View featured image in Album
Posted in Iceland Travel Blog, Photography, Travel | Leave a comment

Shoot Only Puffins, Leave Only Footprints

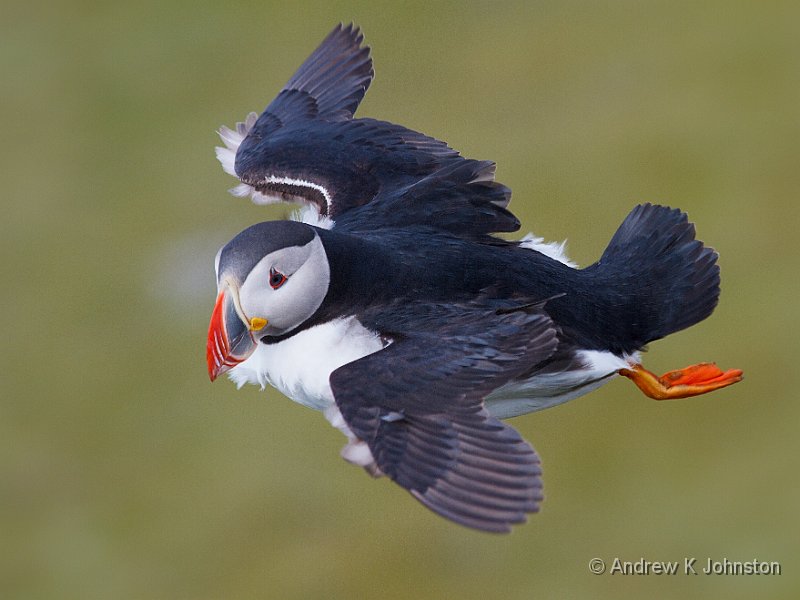
Puffin in flight at Dyrholaey, Iceland
Camera: Canon EOS 7D | Lens: EF70-300mm f/4-5.6 IS USM | Date: 28-08-2011 13:15 | ISO: 200 | Exp. bias: 0 EV | Exp. Time: 1/320s | Aperture: 6.3 | Focal Length: 180.0mm (~291.6mm) | Location: Reynisdalur | State/Province: South | See map | Lens: Canon EF 70-300mm f/4-5.6 IS USM

I was ready for a quiet day of mainly driving on Sunday. I was also ready to report a total of about 1800 shots taken, which is a bit lower than for the Cuba trip, not unreasonable given the slightly shorter duration and the fact that this was mainly landscape photography.

Then we got to the puffin colony… 🙂

Having visited a couple of interesting rock formations (basically basalt columns like Staffa or The Giant’s Causeway), we drove a short distance to the top of the cliff, which was essentially home to thousands of puffins, which were variously sitting quietly or diving off into the sea to catch food. They seem to be quite unafraid of humans, and because of the prevailing wind onto the cliff they had to glide slowly at take-off and landing, sometimes very close to us, which made photography feasible, if still challenging.

Of course, this is what my kit, consisting of the Canon 7D and 70-300 IS lens, is built for. Any minor inferiority complex relative to the 5D and medium format brigade vanished in the face of my 8 frames per second and high performance auto-focus, and I got a number of good shots. The above is probably one of the best, although there are several other good candidates.

It did put the shooting total up a bit. In less than an hour I took well over 300 shots, filling a 16GB memory card and flattening a battery, but who cares. Together with the other shots from the day the total now stands over 2150 – even higher than Cuba!

Our hosts had organised a wonderful end to the day. In the outskirts of Reykjavik we diverted to the hospital where Gruni (Finn’s wife, who had joined us on the tour) works. There we were doubly treated, both to a celebratory glass of champagne and a couple of chocolates, but also to an exhibition of the best of Finn’s photographs, in wonderful large prints. Definitely something to aspire to.

I’m back in the hotel, and busy packing for an early start. I’ll do a final post when I’m home, summing up and listing my tips for any future travellers, but it’s been a wonderful trip and highly recommended to anyone else who wants to try.

View featured image in Album
Posted in Iceland Travel Blog, Photography, Travel | Leave a comment

Fire and Ice – Delivered

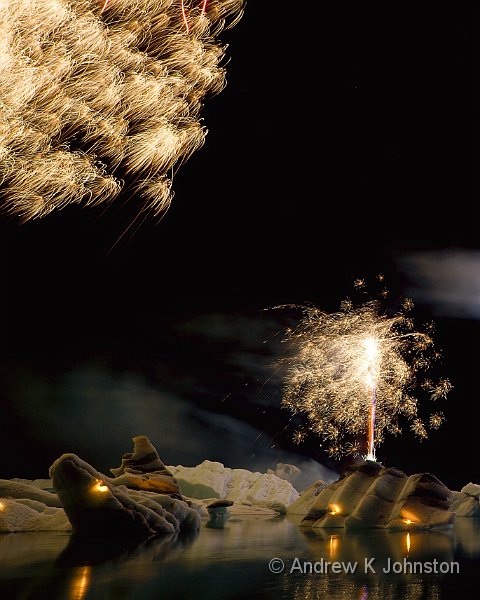
Fireworks over the Jokulsarlon glacial lagoon, Iceland
Camera: Canon EOS 7D | Lens: EF-S10-22mm f/3.5-4.5 USM | Date: 27-08-2011 23:13 | ISO: 200 | Exp. bias: 0 EV | Exp. Time: 8.0s | Aperture: 8.0 | Focal Length: 13.0mm (~21.1mm) | State/Province: East | See map | Lens: Canon EF-S 10-22mm f/3.5-4.5 USM

Saturday was when our tour really delivered on its “fire and ice” moniker. We started the day at the Jokulsarlon glacial lagoon, where an edge of the enormous Vatnajokull glacier calves off into the sea. Whereas 100 years ago this was happening quite close to the sea’s edge, the point at which the icebergs fall from the glacial edge has progressively moved back, and they now fall into a lagoon of mixed salt and freshwater where they tend to hang around for a few days before drifting out to sea. Apparently the edge of the glacier is retreating by a massive 200m per year (due more to the effect of the incoming salt water than global warming), making this the fastest-changing glacier in Europe.

This has famously been used as the location for two Bond films, most notably the car chase in Die Another Day. The problem is that due to all the salt water, it doesn’t usually freeze even in mid-Winter. So they temporarily blocked up the lagoon outlet to stop extra salt water coming in, and waited three weeks for the lagoon to freeze. Why they couldn’t just find a suitable frozen lake somewhere is a good question, so far unanswered.

It is a very dramatic location for photography, with all the shapes and colours in the ice, and under constant change as the ice moves, often twisting and tumbling suddenly as the balance of the mass above and below the surface changes.

After lunch we headed up the coast via another, much calmer glacial lagoon to a waterfall surrounded by basalt columns. Unfortunately we got there just the same time as a bus load of grockles who all wanted to sit right in the middle of the stream for about 1/2 hour having their photos taken… Grr 🙁

The last stop before dinner was a quick walk up alongside the glacial tongue right behind our hotel. This was useful to get a sense of the enormous scale of these, and then try and imagine that each is only a tiny corner of Vatnajokull.

After dinner it was back to Jokullsarlon for the “fire” part of the day – a once a year fireworks display over the lagoon. This was brilliant, and I hope I’ve done it justice.

Sadly, it’s the long drive back to Reykjavik tomorrow, with limited photography, and then home. However, it’s been a wonderful trip, with an amazing and unexpected variety.

View featured image in Album
Posted in Iceland Travel Blog, Travel | Leave a comment

Floating Ice

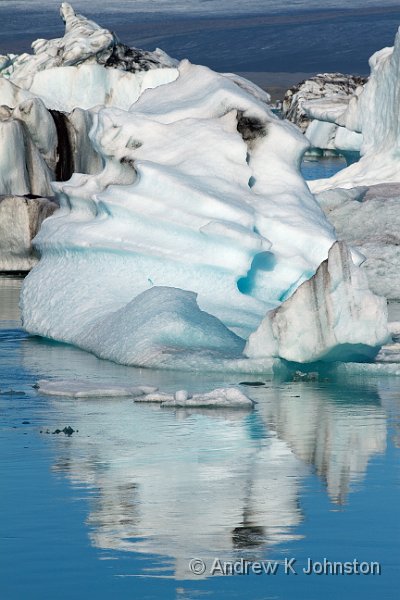
Iceberg at Jokullsarlon, Iceland
Camera: Canon EOS 7D | Lens: EF70-300mm f/4-5.6 IS USM | Date: 27-08-2011 10:06 | ISO: 100 | Exp. bias: 0 EV | Exp. Time: 1/250s | Aperture: 10.0 | Focal Length: 180.0mm (~291.6mm) | Location: Breiðamerkursandur | State/Province: East | See map | Lens: Canon EF 70-300mm f/4-5.6 IS USM

This is a small iceberg floating in the Jokullsarlon galcial lagoon – see post above for details.

View featured image in Album
Posted in Iceland Travel Blog, Travel | Leave a comment