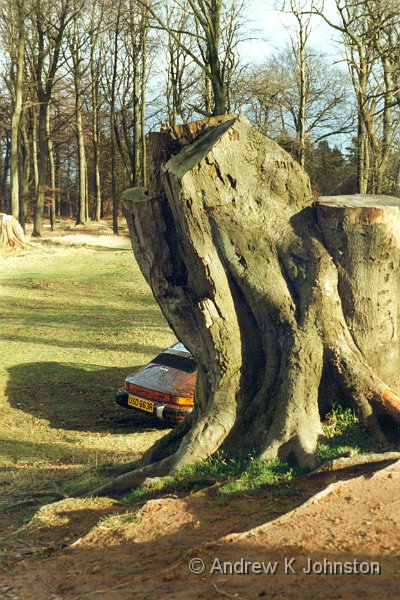
| "Helga", my Porsche 911, behind a tree | |
| Resolution: 1247 x 1870 | |
For the last couple of years, I’ve been working fairly regularly with a chap called Carl. The other day a group of us were chatting, and got to talking about cars we had owned. Among others, Carl had once owned a very souped-up Ford Escort. To explain how fast it was, he pointed out that he’d once “burned off a Porsche” in it.
My ears pricked up, and I interjected “You know, that once happened to me in my Porsche. I was at a set of traffic lights just outside Croydon, and some imp in a mark I Escort pulled up alongside, turned to me with a very cheeky grin, and then left me standing when the lights went green.”
And Carl said “The Sutton bypass. About 1987. Tobacco brown 911 with no rear wing.”
Yes. We were describing the same event from opposite sides of the dotted White line. It was him!
———————
We all occasionally experience odd coincidences, but this has to be a pretty wild one by any standards. It got me thinking – what are the chances of re-encountering someone from an anonymous past event like this?
I reckon that a significant part of the British population have timelines which will never intersect mine at first or even second hand. However between places I have lived and worked, places with which I have family, friend or work connections, events I attend and routes I travel the number of intersections in a lifetime (counting any individual once) must be quite large. Let’s say it’s 10 million. This includes “knows someone I know” and “in the same place at the same time” as well as more direct interactions.
Now I also reckon that I work with perhaps 20 or 30 people at any one time closely enough to have such a conversation, and that group changes at a rate of perhaps 10 people a year. Others might put the figure higher, but let’s use that for now. Therefore since 1987 maybe 250 people have added to that group.
It’s therefore very easy to come up with a crude estimate of the probability that some individual I crossed in my youth would end up working with me, at about 250 in 10,000,000, or 1 in 40,000. That’s about half the chance of winning £10 with a three number match in the British lottery.
However, that’s just the “latent coincidence probability”. You then have to factor in the chance of actually discovering it.
To come up in conversation at a range of 24 years an event has to be pretty memorable to at least one party, and recognisable to another. Trivial or indistinct events get forgotten. I suspect our traffic lights grand prix was one of many for both Carl and myself in our youth, but it’s memorable as the one in which the ancient Escort beat the (almost equally ancient) Porsche, in a way which left my friend and I in my car laughing rather than anything else. I have forgotten almost all the others, where Helga did what Porsche built her to do, and won.
There’s also an upper limit on memorability. If events are too dramatic or tragic they will also preclude conversation.
Even if you have a history of memorable events, they may just not come up in conversation. Carl and I have worked together for a couple of years, and not discussed old cars before. The topic could easily have come up when I was not in the room, or just not listening, and not been repeated.
These factors are more difficult to quantify, but I reckon there’s probably only a 1 in 100 to 1000 chance of discovering the co-incidence at the 24 year range of my example. So for a single event involving just one other main party we have a net probability of the order of 1 in 10 million that I’ll work with that other party, and then discover it. That’s about the same as winning the UK lottery jackpot!
Three factors make things more likely. Obviously if more than one other person was involved this increases the probability proportionately. There’s also a smaller than 10 million group of people whose paths are likely to cross several times because of location or other factors.
You also have to consider that most people have a pool of such events to draw on. We’re talking about events which would merit a special mention in the pub, a couple of paragraphs in the letter home, maybe a blog rather than just a tweet in today’s parlance. I reckon I accumulate these at the rate of one every few weeks. Therefore since my memory became really active, I have maybe 40×25 such events, a convenient 1000 to draw on.
Thus the probability for a given event is ~ 1 in 10 million, but the probability of any such coincidence drops back to ~ 1 in 10 thousand, and maybe down to 1 in a thousand for events based on a home location, a favourite sport or similar.
Now I reckon I’ve had a couple of such coincidences in my career. There are three possibilities: either my calculations are wrong, I’ve set the bar for what counts too low (increasing the number of potential events), or I’m just very lucky.
What do you think?

 List
List Abstract
 One+Abstract





 Thoughts on the World (Main Feed)
 Main feed (direct XML)