
 List
List Abstract
 One+Abstract


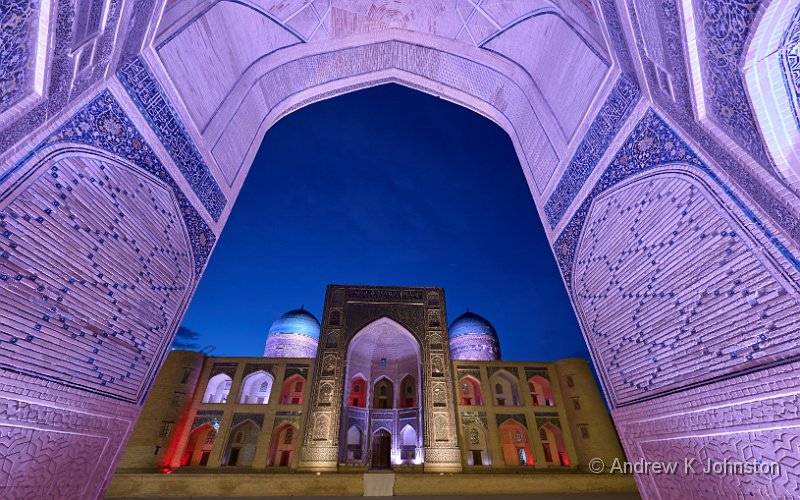
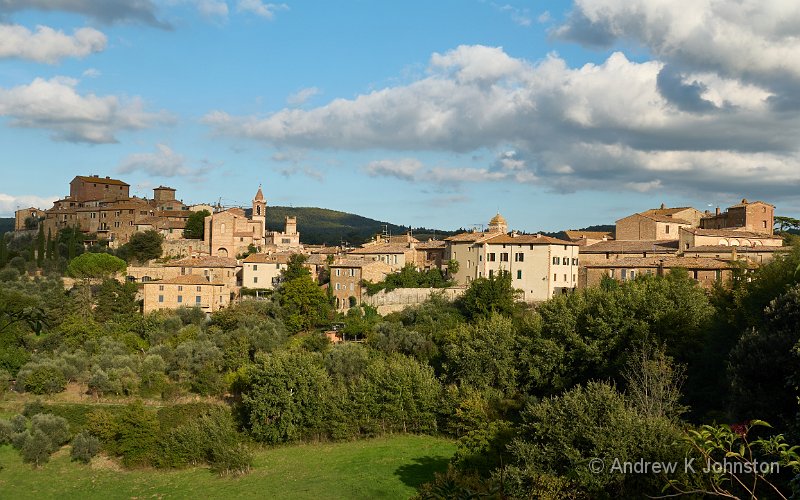
| Poy Kalan Complex | |
| Camera: Panasonic DC-S5 | Date: 26-05-2026 04:40 | Resolution: 6523 x 4077 | ISO: 6400 | Exp. bias: -33/100 EV | Exp. Time: 1/10s | Aperture: 9.0 | Focal Length: 14.0mm | Location: Poy Kalan Complex | State/Province: Bukhara, Bukhara | See map | Lens: LUMIX S 14-28/F4-5.6 | |
If you’re thinking of visiting Uzbekistan, especially for photography, I hope this article will be of use to you. It’s distilled from a longer series of blogs. If you want details of the locations I visited and things I saw, please read the full blog at www.andrewj.com/blog/uzbekistan.
Uzbekistan is a former Soviet republic, independent since the 1990s, south of Russia, north of Iran and Afghanistan. It’s one of only two "double land-locked" countries in the world – completely surrounded by countries which are themselves also land-locked. (If you need it for a pub quiz the only other is Lichtenstein, a tiny principality within Switzerland, about the size of a small British town.)
Uzbekistan is famous for its spectacular architecture. You probably have a mental picture of "somewhere in central Asia" with large Islamic buildings covered in blue tiles. That’s Uzbekistan. I was also expecting to photograph the people and their activities, but I’ll confess it’s the blue tiled buildings which were the initial draw.
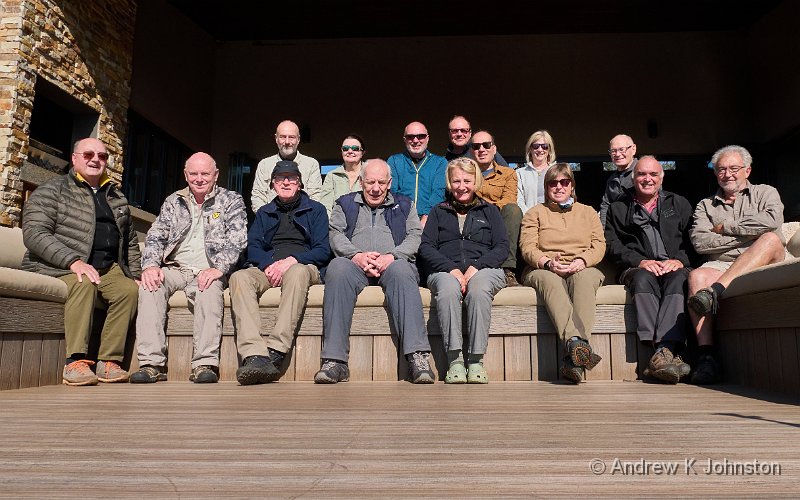
My trip was organised by Light and Land, the excellent Hayley Greenall of Travel Counsellors organised the international travel, and Mehmet Ozbalci was the tour leader.
Over 8 days we visited 4 cities along Uzbekistan’s section of the Silk Road: Tashkent, Samarkand, Bukhara and Khiva. The internal travel consumed at least two days overall, giving us a day and a half in each city. If you do have the opportunity to spend a bit more time that would probably be beneficial.
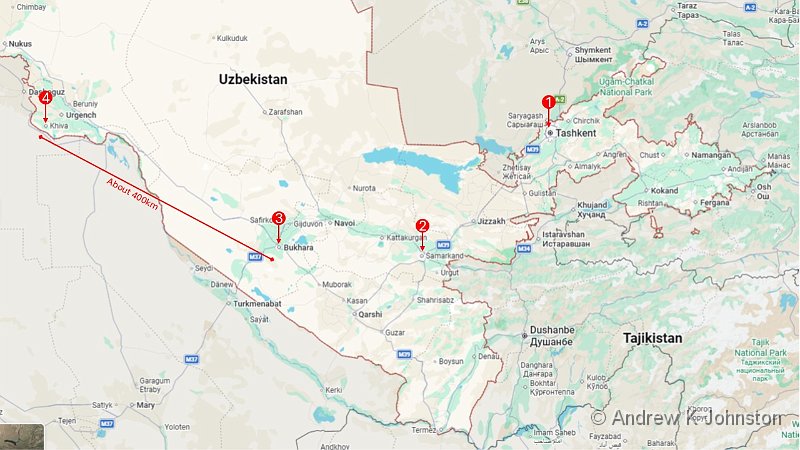
| Uzbekistan Trip Map (Show Details) |
Trains, Planes, and Automobiles
Tick, tick, tick. We travelled from Tashkent to Samarkand by train. This wasn’t the poetic journey the name conjures, but a modern, fast, efficient and comfortable express service taking only a little over two hours.
Around the towns we used a mixture of our minibus for longer journeys, and the readily-available electric carts for shorter hops in the tourist centres.
The roads are mainly very good, but bumpy in places. However the Uzbek approach to road safety takes a bit of getting used to. For a start our nine-seater minibus only had three seat belts, and we were unconvinced by two of those. Then there’s the approach to navigating traffic. If you listen to an elderly soldier talking about firing an anti-aircraft gun, they say something like "you don’t aim at the plane, you aim at where the plane is going to be". Uzbek drivers use a variant, they don’t aim for where a gap is , they aim for where a space is going to be. Sometimes it isn’t. Brace!
The long drive from Samarkand to Bukhara was along a modern, divided multi-lane highway. There were no craters (so a distinct notch up on Mongolia) although in many places the surface has been repaired badly and bouncy progress meant I had to abandon typing my blog. The road is open to all traffic, which means fast electric cars mixing with donkey carts. Direction of travel is observed, but not necessarily lane control and it’s a bit disconcerting to see the fast cars and large trucks all moving to the right to pass a donkey cart, or lad on a bike, in what would normally be the "fast" lane.
We had another, even longer (480km) drive from Bukhara to Khiva. The first 400km or so passed very quickly and smoothly on an excellent highway, noticeably newer and in better condition than that from Samarkand. We did have to stop for some goats crossing, which doesn’t often happen on the M25.
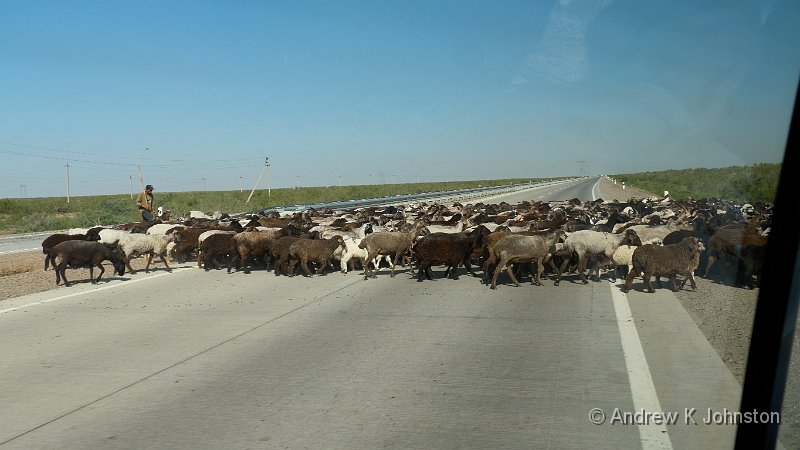
| Don’t try this on the M25! (Show Details) |
However the last 80km was more problematic. Our plan for lunch failed as all the roadside restaurants were shut due to a bank holiday. As I had probably eaten a whole sheep on the trip so far there was no immediate risk of starvation, but our driver decided to turn off the highway and take a minor road in the hope of finding food. The road descended rapidly from road to cart track with passing places. Instead of the modern 4 lane bridge in Urgench, we crossed the large river on a pontoon bridge, with jury-rigged width restrictors made of hay bales and joins between the tired old pontoons covered by loose steel sheets. Our driver admitted he had never previously used that route! He could have asked me – my map predicted a very minor road, although not the state of the bridge.
To make the round trip workable, we took an internal flight back from Khiva to Tashkent. Check-in at the airport was remarkably easy, with most of the formalities being handled on our behalf by Ganisher, and no complexities around extra baggage fees like in Mongolia. The good news: it was dramatically faster than the 2+ days we spent doing the outbound journey by train and minibus. The bad news: it still takes almost 4 hours, not because of the flying time but because the plane also stops at Bukhara, and the process of disembarking some passengers and then boarding a few more is interminable. There were no refreshments, and we were desperate for a coffee when we arrived.
From the West, Uzbekistan is probably reached most easily using Turkish Airlines via Istanbul. This means confronting two challenges: Turkish Airlines’ complete inability to manage a queue, and the fact that Istanbul Airport is among the most expensive and least comfortable places for a layover. The ideal transfer time is probably 3-4 hours: any less and you run the risk of busting a gut to catch your transfer; any more and it gets very costly. For more details read my blog. Those annoyances aside, the actual flights were smooth and prompt, although I’m not convinced the air conditioning was working on the flight back from Tashkent.
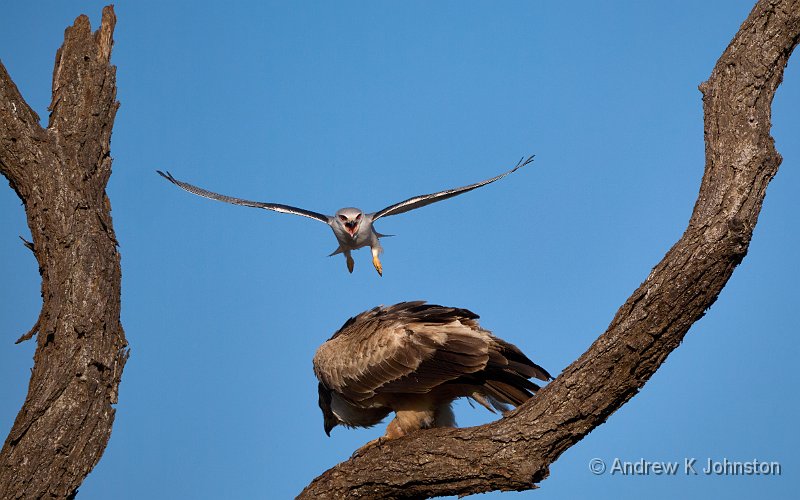
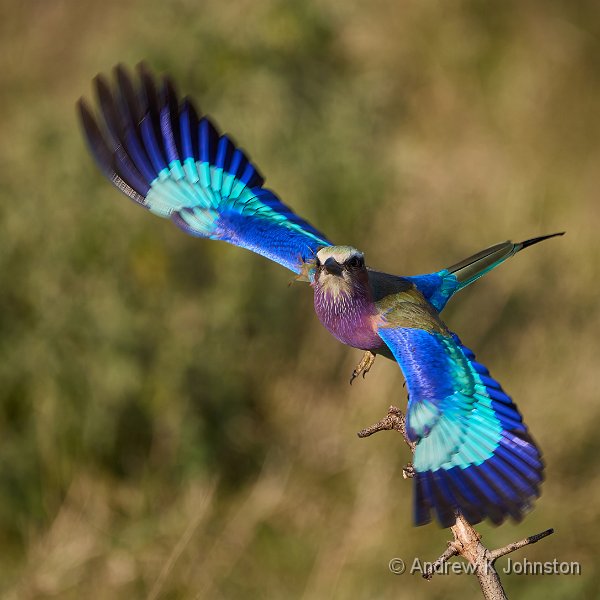
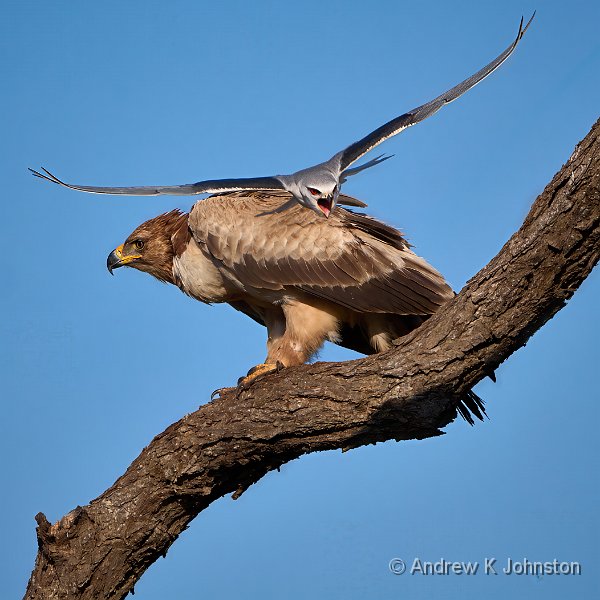
Photography – Subjects
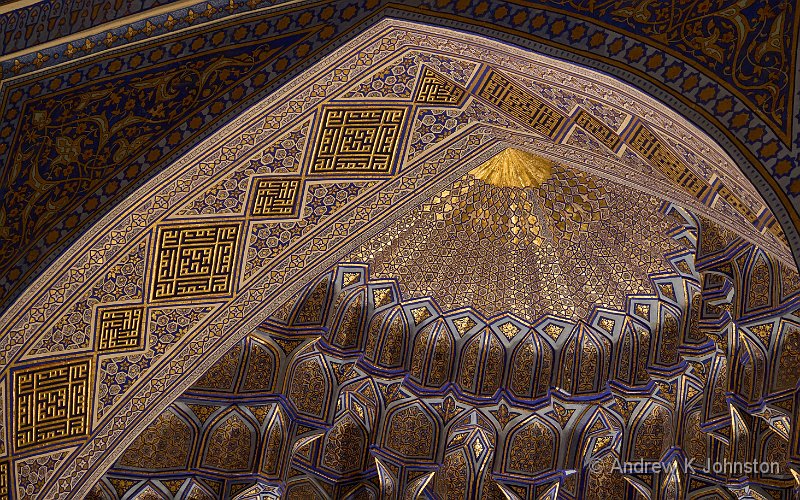
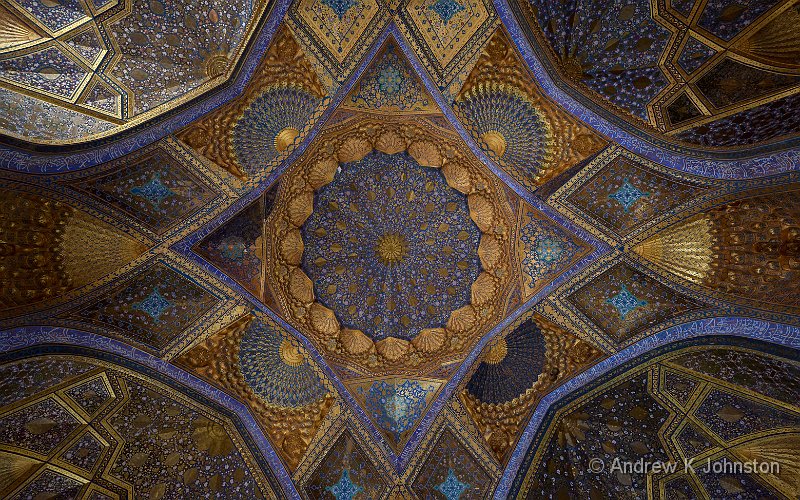
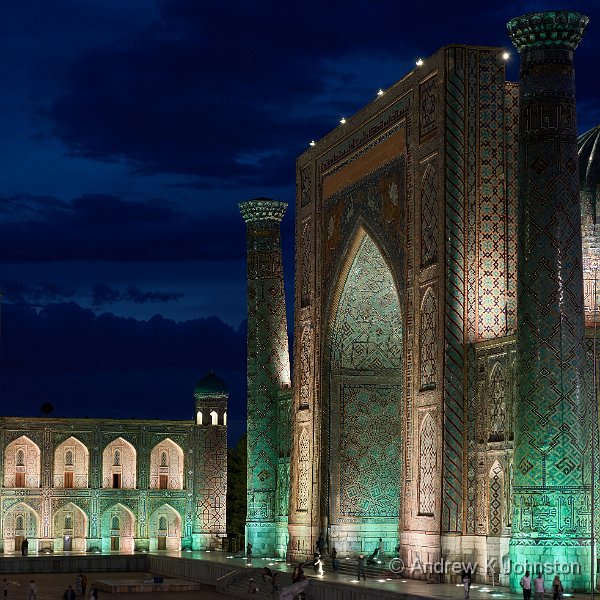
The monumental architecture of the various mosques, madrassas and mausoleums delivers exactly as expected, both inside and out. After a period during Soviet rule when maintenance was neglected, most of the buildings are now in very good condition, although eagle eyes may always spot the odd missing tile. You can capture good shots throughout the day and in any reasonable weather, but as ever the best results are at the ends of the day, especially if the buildings are lit through blue hour. Our evening shoots all worked well, but a couple of the mornings were a little disappointing with expected buildings not lit up.
| Amir Timur Mausoleum Complex (Show Details) |
At the more popular sites you will have a challenge with other tourists in your wider shots. There’s nothing special about the resolution, you can either accept them as part of the reality, "shoot high" over them, or set up for a shot and wait patiently for a break in the human traffic. On a positive note, I benefited in a couple of cases by "model stealing", shooting a model who was there for someone else. Just don’t start a fight…
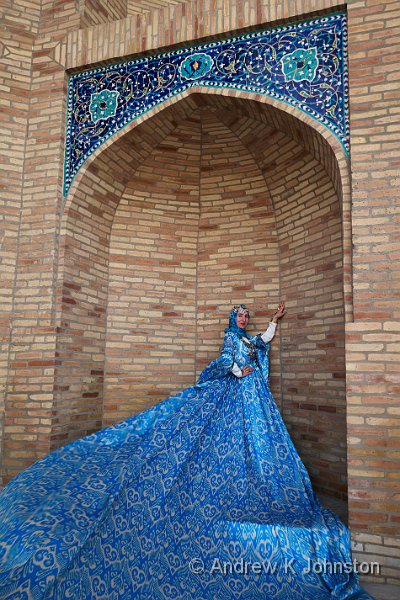
| Borrowed model, Khast Imam Complex (Show Details) |
Architecture does not have to be ancient. Many Soviet era and more recent edifices are also worth a photograph. Tashkent was largely rebuilt after a major earthquake in 1966, and provides many interesting subjects.
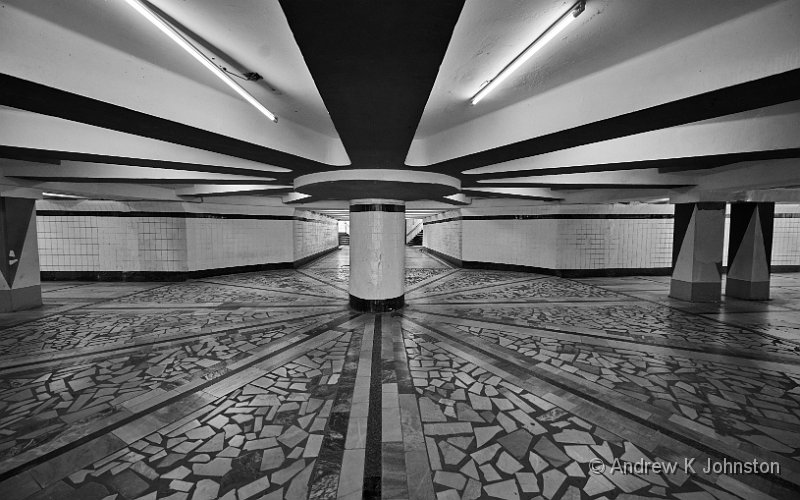
| Pedestrian Subway Tashkent (Show Details) |
Let’s get one thing out of the way. There’s no scenery. If your mental image of the Silk Road is camels or yaks threading though narrow mountain passes discard it instantly. The Uzbek stretch is flat (think Norfolk / Flanders / Nebraska). Historic Samarkand and Bukhara are built around small hill systems which formed natural fortifications, but most of the time you can calibrate a spirit level by laying it on the ground.
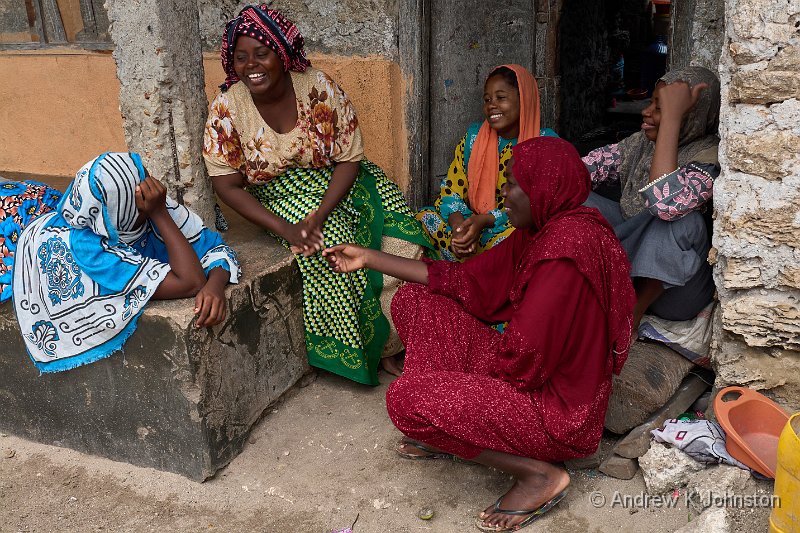
That leaves people. I was hoping that we might get a few appropriately-dressed and cooperative locals, but slightly fearful that as many Uzbeks are Muslim either privacy considerations or religious concerns about portraiture might be an issue. I needn’t have worried. You do need to seek permission for portraits, but I found that eye contact and a "do you mind" gesture is about 90% successful. Just make sure you honour those who seem unwilling or uncomfortable. We didn’t have anyone demanding payment for a photograph, but it’s normal and reasonable to give a small tip for posing or being extra-accommodating.
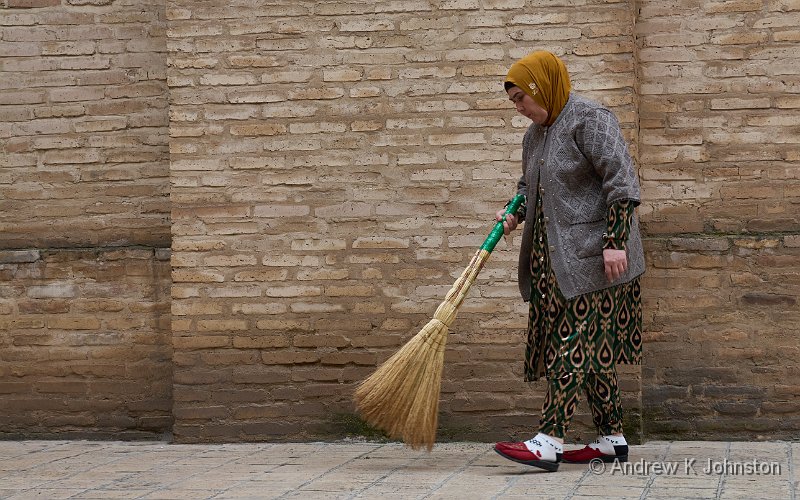
| Lady cleaning at the Shah-i-Zinda Necropolis (Show Details) |
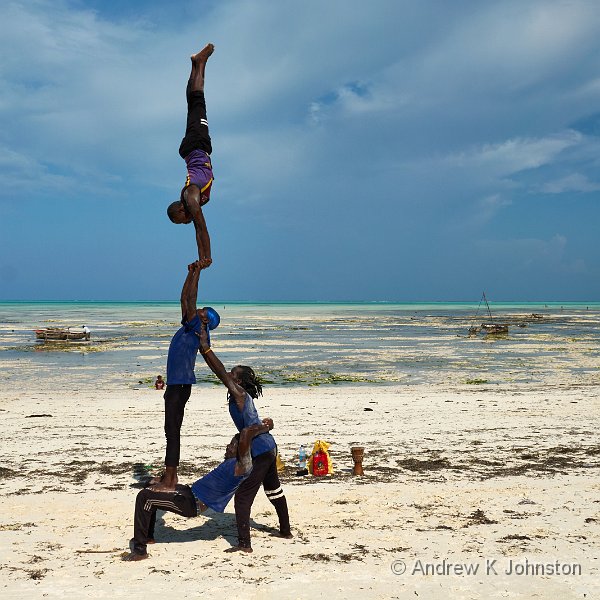
What I wasn’t expecting was the cultural shows. We attended three very different cultural events, each of which provided very distinct subject matter, but also different technical challenges.
The first was a dance show in Samarkand called Marokand. Courtesy of our guide being one of the theatre’s managers we had unique backstage access while the female dancers applied their makeup, and then front-row VIP seats with no constraints on photography. The dancing and costumes were stunning. The technical challenge was that the various backdrops are projected digital video, and all the lighting is LED. This means that the fastest possible shutter speed is 1/60s, otherwise your image contains blotchy, stripy backgrounds and odd lighting effects. 1/60s is not really fast enough to capture dance movements. However you may be lucky and capture a moment where the dancer is momentarily still, or maybe facing forward through a turn so her head is not moving even if the rest is.
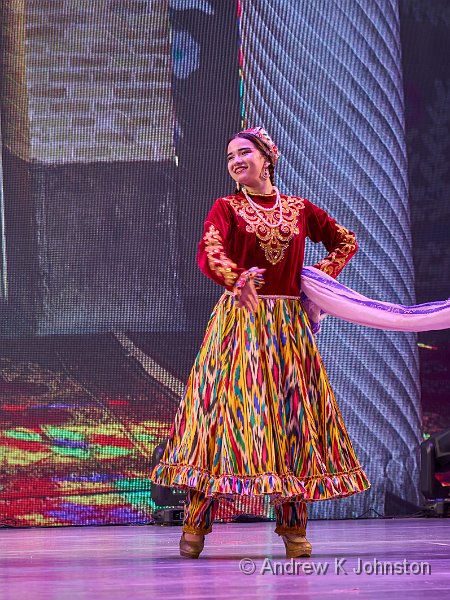
| Marokand Show (Show Details) |
The second was a fashion show in Bukhara. This included some traditional dancing, but was mainly about local designers showing off fashions combining traditional Uzbek shapes and patterns in modern clothing. The cabaret setting provided the challenge of photographing the models but minimising the distracting background, and I also discovered a shortcoming of Panasonic’s subject tracking autofocus. This accurately tracks the girls as they come towards you, but fails immediately the dancers spin or the models turn around, especially if they are wearing unusual-shaped clothes or making odd arm gestures, and focus flips to a random member of the audience in the background. At least I could use my go-to shutter speed of 1/250s to freeze movement "just enough".
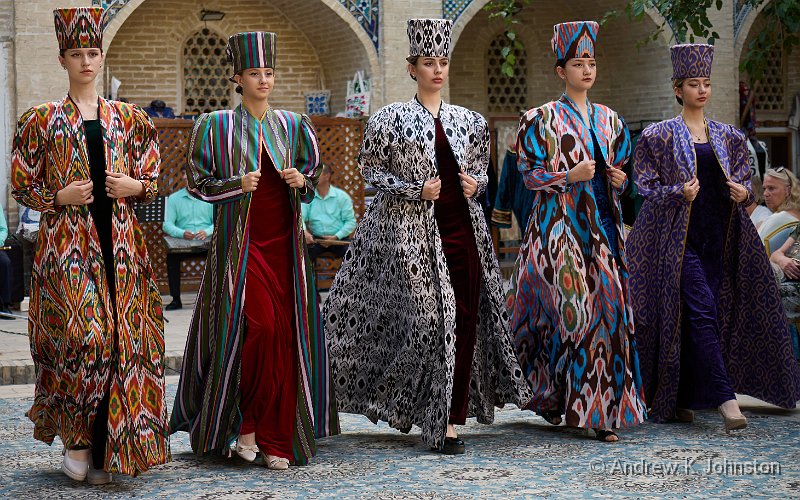
| Bukhara Fashion Show (Show Details) |
Finally in Khiva we had a short concert of traditional music and dance. This was photographically straightforward, the only challenge was our leader and guide battling to keep other non-paying from barging into shot.
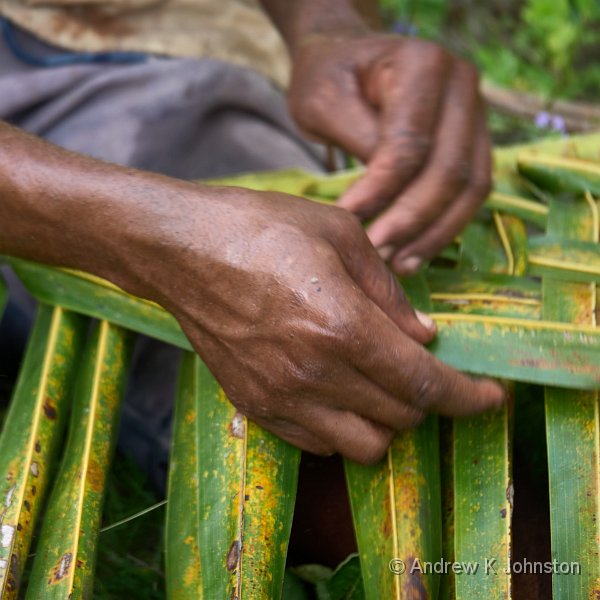
Generally you will find plenty of people who want to either show off their wares, or a particular skill, and are happy to do it for the camera in exchange for a suitable tip. That’s where having a good guide comes in useful. For example in Bukhara we went to the workshop of a blacksmith family who have a particular "crowd pleaser" stunt which generates a dramatic shower of sparks.
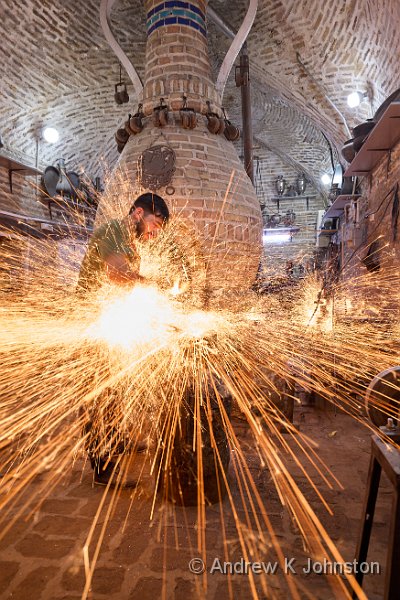
| Blacksmith’s Workshop (Show Details) |
Photography – Kit & Technique
I took three camera systems to Uzbekistan. As always the main system was my Panasonic G9ii. I realised in advance that I was unlikely to need a long telephoto, and that was correct. Most shots were taken using the 12-35mm zoom (24-70mm equivalent), with the 35-100mm used extensively for both the shows and details. While I packed my 100-300mm it was almost unused, and most of the time I left it in my luggage most of the time in favour of the diminutive 45-175mm. That was quite long enough, and saved some space and weight (it’s about the size of a toilet roll tube, and weighs only 210g).
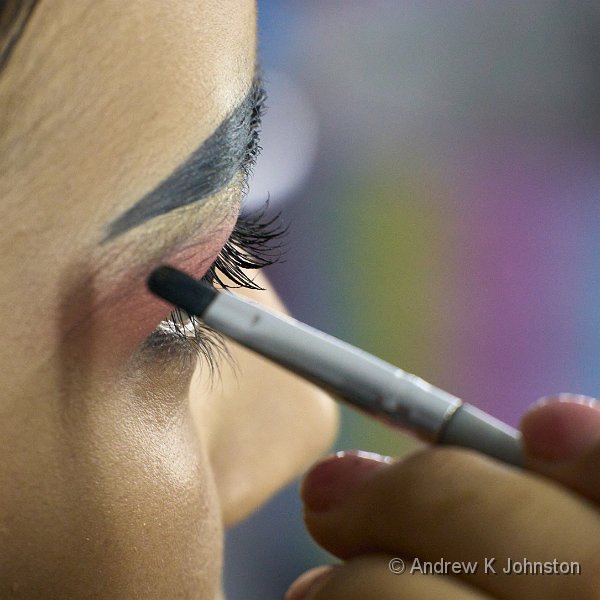
| Make-up for Marokand Show (Show Details) |
The weight saving on the G9ii kit was just as well, as most of the time I was also carrying a full-frame system: the Panasonic S5D with 14-28mm and 20-60mm lenses. I agonised about whether I needed the extra complexity and weight, but Mehmet persuaded me that it might be beneficial, with its high-ISO capability, dynamic range and wider zoom, for the interiors and blue hour shots. He was right: it captured the wonderful interiors beautifully, and as a side benefit was easier to protect when we photographed the blacksmith’s workshop.
| Ak-Saray Mausoleum (Show Details) |
Finally, as I’m short-sighted I can’t use my phone to take photos when I’m wearing my "distance" glasses, so if I’m not carrying a larger camera the Sony Rx100vii with its excellent little EVF is always in my pocket. While it couldn’t cope with the very wide or faster action shots, it continues to shine as a general-purpose backup camera. Most people will use their phone in a similar role.
Did I need both the micro-four-thirds and full-frame systems? Possibly not: I could have focused on the G9ii, leaning into its amazing dual stabilisation and faster lenses to just shoot the interiors at ISO 1600. I could have supplemented the full-frame system with a medium telephoto and accepted a marginal speed limitation for the action subjects, although that would have required buying another lens (and a spare body). However I wasn’t the only person wandering around with two camera bodies, and the combination worked very well. Both bodies, the selected lenses and all filters and other paraphernalia disappeared into a Lowepro AW 190 shoulder bag which worked very well in the urban environments.
In terms of zoom range, ideally you need to cover from 14mm to 300mm in full-frame terms. Limiting yourself to 200mm at the long end wouldn’t be a major loss, but try to make sure you can go wide enough. Even 16-18mm would limit a few opportunities, and in turn I was on a couple of occasions jealous of the member of our group who had a 12mm wide lens. Stitched panoramas work fine for exterior subjects, but don’t work very well for interiors.
Apart from deep into blue hour I worked hand-held. Few other shots required an exposure more than 1/5s on the G9ii (holding ISO to 1600 or lower) or 1/40s on the S5D. Neither of these is an issue with wide-angle lenses and image stabilisation. The tripod was just an extra thing to carry, and wouldn’t have been practical in the busier interiors anyway. As always, YMMV.
You will need access to a tripod for blue hour or night time shots. Even I can’t hand-hold a full-frame camera for 2s! I took my lightweight Frankentripod, but on at least one occasion when I needed its support (well after sundown in Samarkand) it wasn’t tall enough to get over the barrier. Meanwhile Mehmet was carrying his tripod and I had a spare Arca Swiss plate, so we just took turns using his. That may be a good solution for a small group, as often there’s only one ideal position for the tripod and camera to get a balanced composition.
One thing to beware of is flare, particularly in dark interiors where there are a few shafts of sunlight. A standard lens hood won’t do much good if sunlight is falling directly onto your lens. A hand or hat may help, but the best solution is to get a colleague to stand in the way!
Drones are banned by default in Uzbekistan, and I left mine at home. However there were definitely some areas such as the centre of Bukhara which would have rewarded a higher viewpoint, and I’ve been told that if you work through the permit application system the success rate is quite high. If you are a keen drone flyer it may be worth the effort, but don’t try importing or using a drone without a permit.
Over 8 days I took a total of around 5500 images, and after initial filtering I have around 1600 which are worthy of further review. Most of the volume came from the dance and fashion shows, although by no means all. Make sure you pack enough cards and batteries.
People
Uzbekistan is a dynamic young country with wonderful old buildings. The overall feeling was a country which is modernising, with its face towards the West, as quickly as possible, and trying to right the limitations imposed during the Soviet era.
Notable among these were the constraints on education. Uzbeks were essentially told "your job is to grow cotton, you don’t need much education to grow cotton, so why should we bother educating you". I’ve come across other examples of similar oppression, but few in the living memory of people younger than myself.
Historically these cities were centres of learning which still impacts on our lives today. Ibn Sina was a native of Bukhara. He was a pre-eminent physician, who in many ways founded modern medicine. The "cine" in "medicine" comes from his name. Mathematician Muhammad ibn Musa al-Khwarizmi was born in Khiva. His most famous work gave us a language in which to express and manipulate mathematical problems: "Al-Jabr", or algebra. Part of his name, the place of his birth, gave us our term for methods to systematically solve such problems: "al-Khwarizmi", or "algorithm".
Today Uzbeks are honouring their heritage with a strong focus on education. I’m used to getting somewhat senior and well-qualified local guides on photo tours – they are often treated as "flagship" events which attract extra effort and the "boss’s" personal involvement. However I think this is the first time I’ve had a guide with two degrees, who personally sits on national tourism committees, and who is currently doing a PhD in related matters.
The vast majority of those who interact with tourists speak good English. Kids playing in the street want to practice their English with you. Older people may need help with anything complex, but for simple transactions gestures usually work, and prices are just typed out on a calculator or phone.
Generally I felt welcome, with polite and friendly nods or a "Salam alaikum" even from random strangers. Stall-keepers don’t seem to have a problem with browsing or taking photos, although as ever you should reward real service. If you do make a purchase there seems to be little requirement to haggle, or benefit from doing so, but that may mean I just wasn’t doing it right! However beware that once a shop-keeper has you as a captive audience they will put some effort into selling you more stuff. That’s just shopkeepers, not specifically Uzbek ones…

| Bukhara bazaar display (Show Details) |
One thing which is really heart-warming is to see even quite small children playing in the street, running errands, interacting with adults, just being allowed to BE, not locked away somewhere with only a screen for company. In Khiva there was one particular little girl of maybe 5 in a pink dress who we saw all over the city and on the route down to our hotel, usually carrying a bag of stuff with a determined expression on her face. Her mother obviously keeps her busy when she’s off school running little errands, but I suspect it’s growing a sense of self-reliance which will be valuable later. If I have to guess which environment will create the more capable young adults, it won’t be ours.
| Chorsu Bazaar (Show Details) |
Money
Hotels, larger shops and restaurants may take cards, and things like hotel laundry might be quoted and paid for in dollars, but in practice you’ll pay for most things in the local currency, the Som. Like many Asian currencies, it has a very high exchange rate to major Western currencies. There’s the normal daily variation in those rates, but as of mid-2026 they are suspiciously convenient at almost exactly 12,000 Soms to the $1, 14,000 to €1 and 16,000 to £1.
The maths isn’t too bad, but do count the zeros. The largest note is common circulation is 100 000 Soms, which is about £6 / $8. As always, try and keep a collection of smaller notes for low-value interactions, as some vendors may struggle to make change. At one point I purchased a 7 000 Som bottle of coke and proffered a 10 000 Som note, but the lady only had two 1 000 notes in her till. Rather than a load of shrapnel I got a couple of packets of sugar in lieu of the remainder. One suspects Uzbekistan is a year or two away from copying Mongolia and just getting rid of three of the noughts by moving to something like a "kSom" base unit.
You must change foreign currency at an official exchange. Unofficial exchanges are frowned upon and potentially attract significant punishments, but there’s no evidence of a "dual rate" arrangement, so you might as well follow the rules. As well as banks, there are usually booths in larger hotels, but also ATMs into which you can feed well-known western currencies and receive Soms back.
Effort, Safety and Security
At least in tourist areas, there really is no issue regarding personal safety and security. I never felt that there was anyone eyeing up me or my possessions, and, packets of sugar as small change notwithstanding, everyone with whom I interacted financially was scrupulously honest and accurate. There are no gangs of young men on street corners – they are appear to be gainfully employed. Road traffic is very careful around pedestrians, and drivers usually give way if you’re trying to cross the road. The centres of Bukhara and Khiva are pedestrianised. I got the impression that the female members of our group didn’t feel any more exposed than I did.
One reason for this is the Uzbek Tourist Police. They are a distinct branch of the police force, whose primary role is to ensure the safety and security of visitors to the main tourist locations. They are deliberately visible, both in person and through clearly-marked cameras. The upshot is a feeling of absolute personal security when wandering around tourist centres, and a clear point of contact for any services. At one stage our we discovered a card left by a previous user of an ATM, and less than 100m away was the obvious place to hand it in. It was also the Tourist Police who give me a chance to use my carefully-practiced "Wa’alaikum Assalam", most interactions being rather less formal!
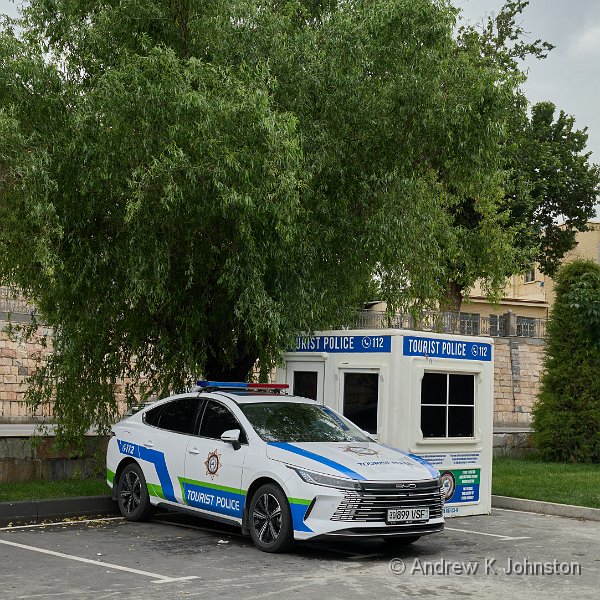
| The Tourist Police (Show Details) |
You do need to carry your passport and most of your cash with you. The passport is a legal requirement, and there may be a fine if you can’t produce it. Most hotels don’t have in-room safes, so the bulk of cash is probably safest on your person.
At a practical level, you will do a lot of walking. I recorded an average 14k steps a day. Most walking is on good surfaces but there are occasional steep steps, especially up to the fortifications in Bukhara and Khiva. Handrails and guard rails are provided on an intermittent basis, so watch yourself around edges.
Communications
Most of our hotels offered good, free Wifi, although the service was occasionally slow or limited to core web-browsing services. The same was true of some restaurants, and areas like the airport lounge.
If you want to maintain connectivity the best option is to purchase a local SIM on arrival in the baggage hall of Tashkent airport. These are cheap (£6 for 100GB and unlimited local calls & texts) and registration takes only a few minutes, with none of the complexity often imposed. Once loaded into my phone I was rarely without connectivity, and most of the time I had a strong 5G connection. Several times I ended up using my phone as a hotspot in preference to the hotel Wifi.
If your phone doesn’t support dual SIMs then eSIMs are another option, and seem to work fairly well, but I didn’t try that personally.
Food and Drink
Food has a lot in common with Eastern Mediterranean and Persian fare. The default meat dish is shashlik: a kebab of pieces of chicken or lamb, occasionally beef. The food is not highly spiced, allowing one to enjoy the taste of the main ingredients. Uzbek lamb is rightly praised, up alongside the best from Wales or New Zealand, and it would be a shame to smother it in chilli or similar.
If you order an explicit meat dish then beware that the portion is likely to be substantial (albeit nowhere near the bonkers level in Mongolia). In one restaurant I made the mistake of ordering "Khan’s Sword (small"). They also do a large one!
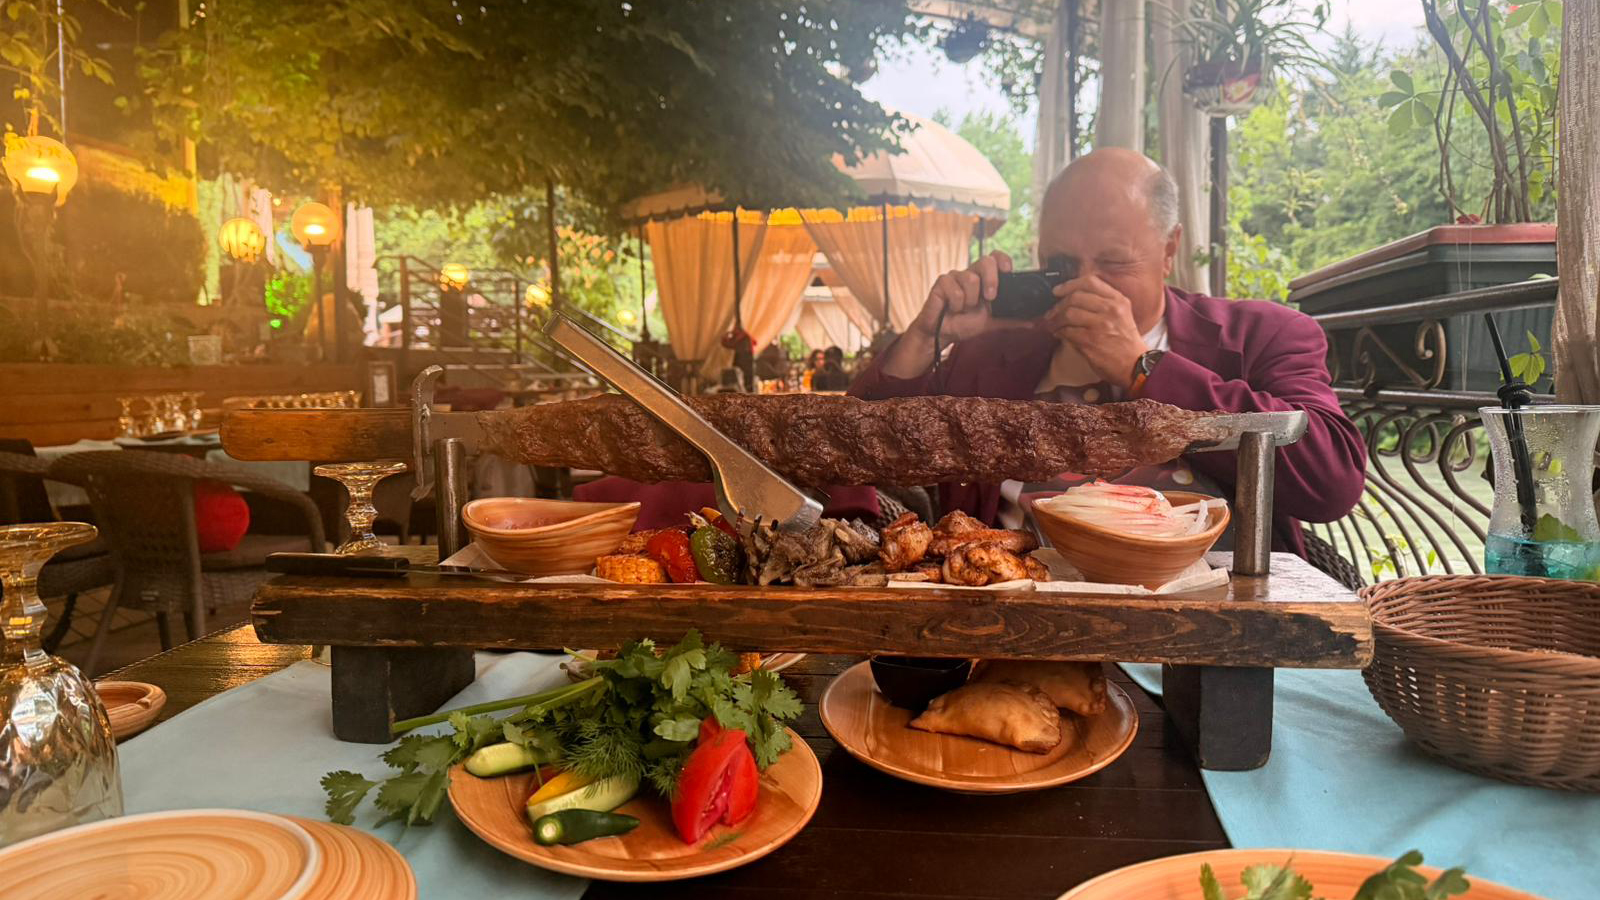
| Khan’s Sword (Small) . They also do a large one! (Show Details) |
The undisputed national dish is plov (sometimes "pilov"). This is often described as "a slow-cooked feast of rice, meat, carrots, and onions". However in contrast to ordering a meat dish, the couple of times I had plov it was almost entirely rice and vegetables, with little sign of meat. Whether excellent or disappointing the food as served rarely bears much resemblance to the stock pictures in the menus, especially regarding accompaniments.
There are some delightful vegetable dishes: I particularly liked baklajon salat (Uzbek crispy fried aubergine salad). There are also usually a range of uncooked salads on offer, but a few days into the trip I had a touch of tummy trouble and went on the "Bottle & Burger Diet"™ (don’t drink anything which didn’t come out of a bottle, don’t eat anything which hasn’t just been cooked), so from that point on salads were of only academic interest to me.
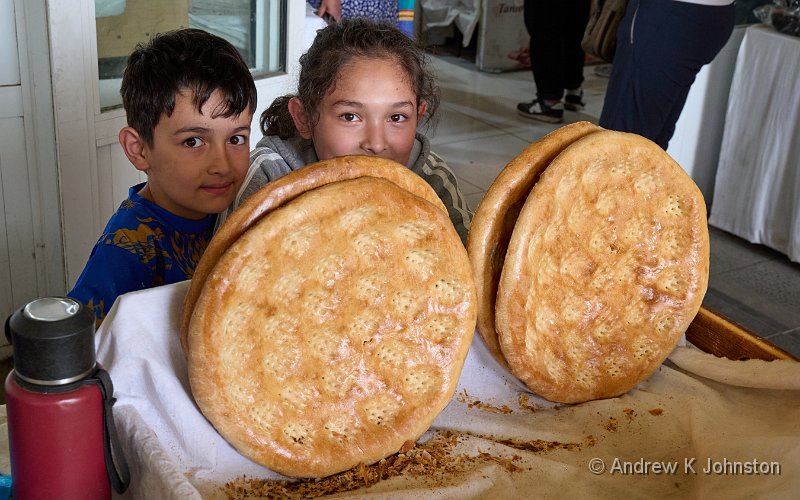
Each region has its own distinctive bread, or non. The loaves are torn apart rather than cut with a knife, and you have to honour the bread by, for example, not putting it upside down. With apologies to the other cities, the Tashkent bread featured above is delicious, light, and easily the best!
Obtaining drinks can be entertaining. Beer is straightforward – the main local beer is Sarbast, brewed by on offshoot of Carlsberg, and I can highly recommend it. Wine is more of a challenge. On one occasion we were given "French Wine" – literally that’s almost all it said on the label, in a spirit of "get the problem out of the way in the title". Most of the rest of the time we had a locally-bottled Merlot, easily recognised by the large red "Me" on the label.
One evening we’d had our usual four beers, and decide to also get a bottle of wine. We tackled the young waiter, and said "can we please see the wine list". He disappeared off for several minutes, and then turned up and proudly announced "we have red wine, and we have white wine"! Suspecting we were not going to get any more information we sent off for a bottle of red wine. Fortunately it was the "Me" merlot, perfectly drinkable but obviously the concept of grapes and vineyards seemed to be bypassing our hosts. (In fairness, most are Muslim, so it’s not of direct interest to them.)
The "secular but Muslim" reality also tripped us up another way. The last few days of our trip coincided with the Eid al-Adha (Jacob’s Sacrifice) Festival, which takes place over four days in Uzbekistan. This affects food and drink availability in two ways: it takes people out of the supply chain (e.g. all the closed restaurants on our drive to Khiva), but it also reinserts them on the consumer side. By the last day we could see clear evidence of digging deeply into food and drink reserves. Our supposedly top restaurant for the last group meal had waiters circulating with a printed list of "what’s off", including, for example, the whole page of soups except broccoli and lentil (yeuch). It wasn’t a disaster, but might be worth avoiding the long festivals if you have a choice.
With the exception of a few posh restaurants in Tashkent money goes a long way. In a typical restaurant serving tourists and locals a main course is around £5 and a beer £3. In shops focusing mainly on locals prices are even lower, e.g. about £0.40 for a bottle of coke.
Weather and Clothing
Tourists usually visit Uzbekistan in late Spring or early Autumn. The middle of summer can be uncomfortably hot, and the winters are very cold, witness the sheepskin hats on sale, and the heavy-duty coats at the fashion show.
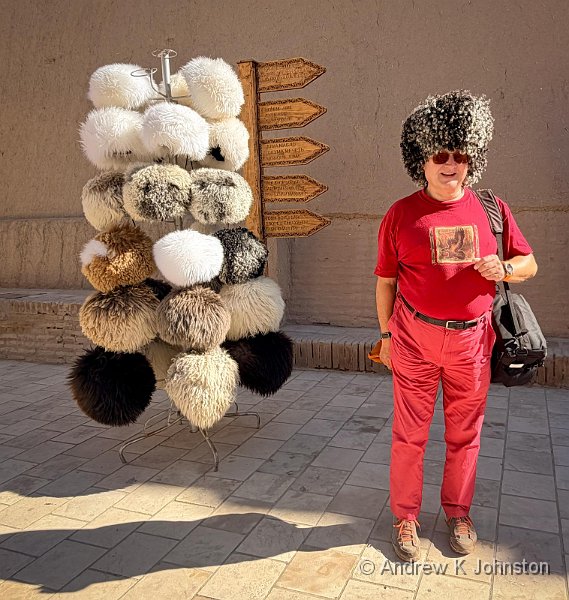
| Winter Hat Testing in 30C (Show Details) |
I worked on the basis that it would be "shorts and T-shirt" weather similar to the average in a British summer. The T-shirts were fine, but the shorts never came out of the case. The first reason was that Tashkent and Samarkand simply weren’t warm enough – for the first couple of evenings I wore the jacket I’d worn to travel in and was grateful for it. The other reason is that many of the religious monuments have a dress code, and for men T-shirts are OK, but shorts and singlets are not.
Ideally, prepare for rain by carrying a pack-a-mac or similar. We arrived in Samarkand about half an hour before a storm which dumped 29mm of rain, about half an average month’s worth, in 45 minutes. Our guide tried to say it wasn’t typical, but the well-engineered storm drains on the roads and around buildings suggested otherwise. Fortunately we were rescued by an itinerant plastic mac salesman:
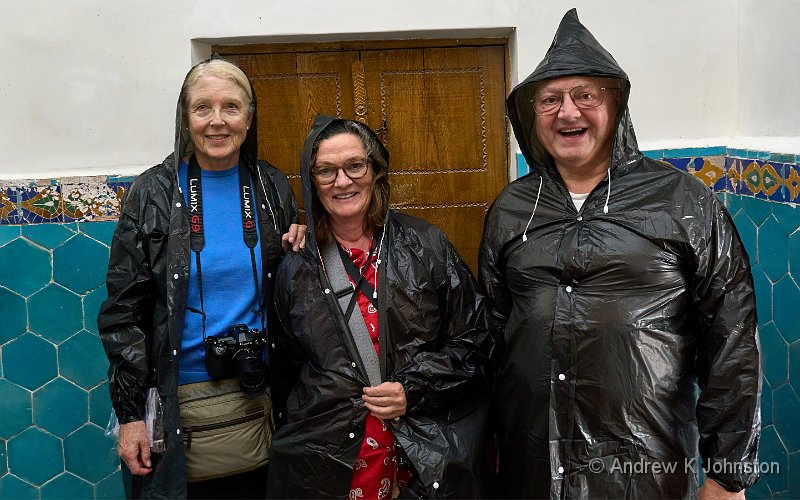
| Plastic Mac Sales Are Up! (Show Details) |
Summary
Uzbekistan is a safe, welcoming destination with a lot to photograph. It combines a predominantly young, enthusiastic and helpful population with some beautiful historical monuments. It should be possible to visit under your own steam, but the services of a guide will help you get the best from your visit. Highly recommended.
| Registan Square (Show Details) |


 Email me
 Others
 Main feed (direct XML)